Creating a MonoGame 3.7.1 Project in Visual Studio 2019
By Stephen Armstrong // October 22, 2019
How to create your first MonoGame project.
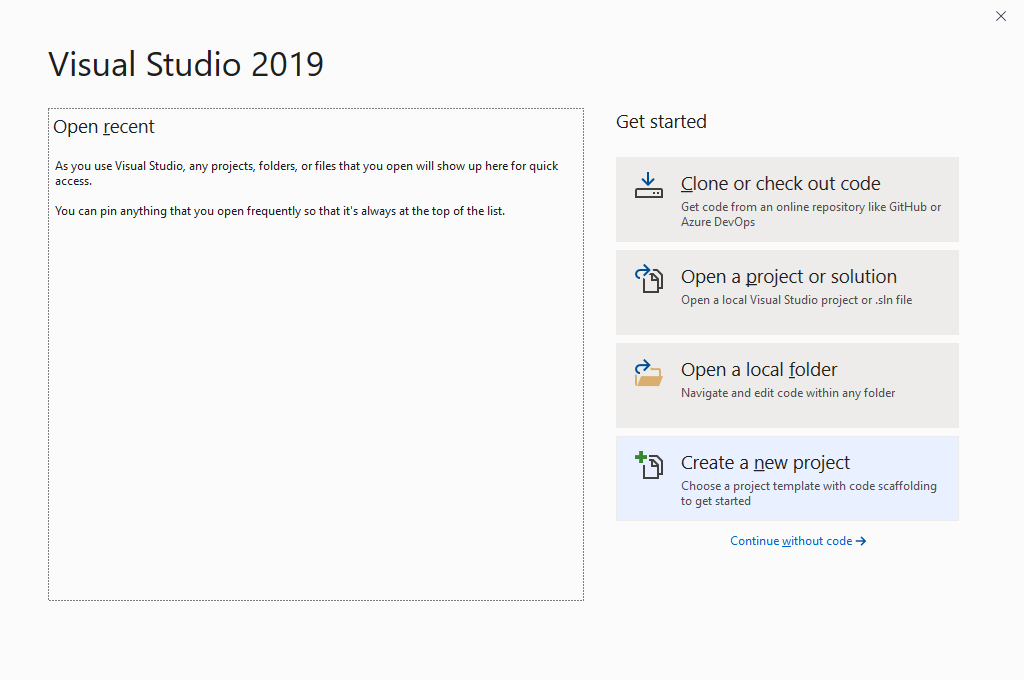
- Open Visual Studio 2019.
- Click Create a new project
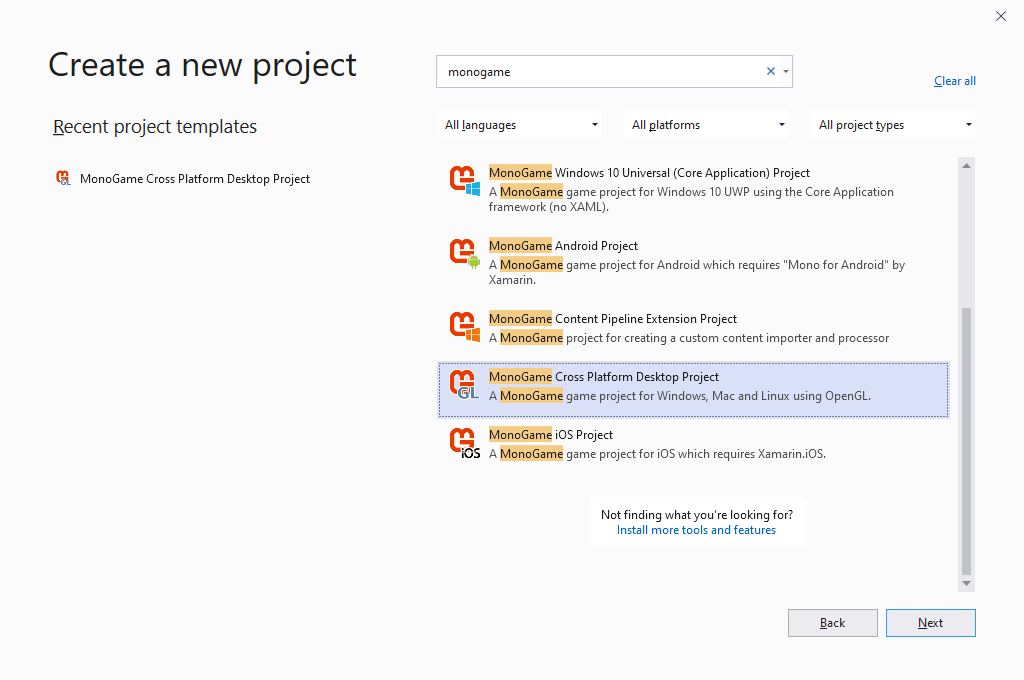
- In the Create a new project window search bar, search for “monogame”.
- Select MonoGame Cross Platform Desktop Project and click Next.
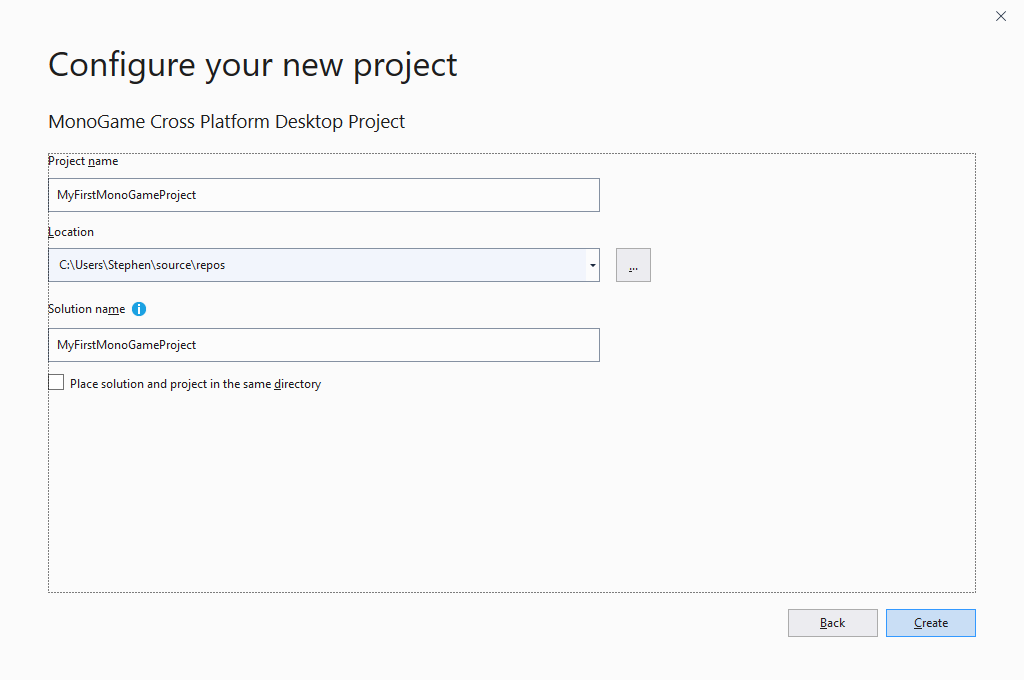
- In the Configure your new project window, enter a Project name. This will be the game’s name.
- Click … to select a location to save the project.
- The Solution name can be the same as the Project name, or it can be different.
- Click Create and the project will be created and opened.
- On the right side of the screen will be the Solution Explorer (if the Solution Explorer does not appear, click View > Solution Explorer to open it).
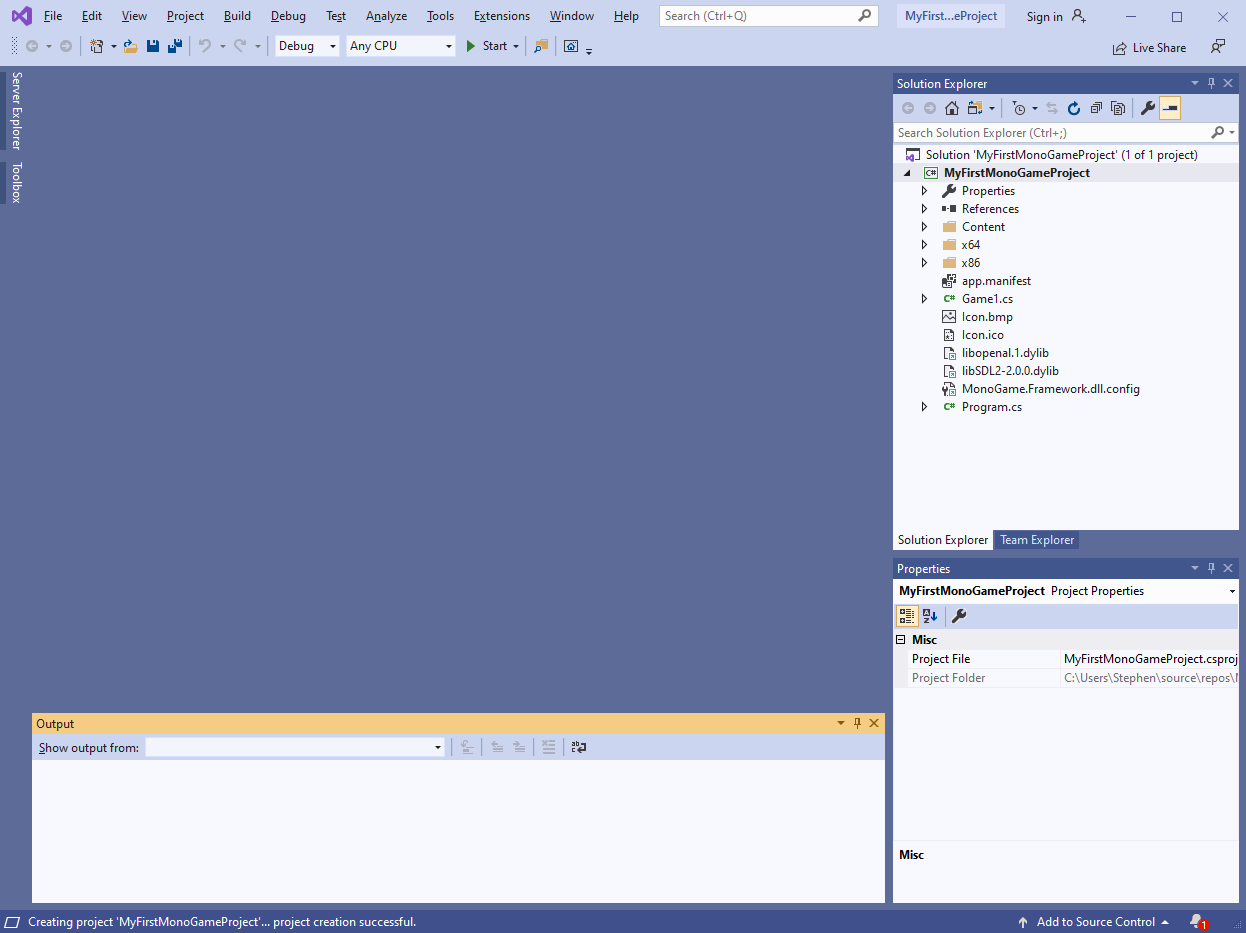
- Find Game1.cs in the Solution Explorer and double click to open it.
Game1.cs
Game1.cs is the main class in your game.
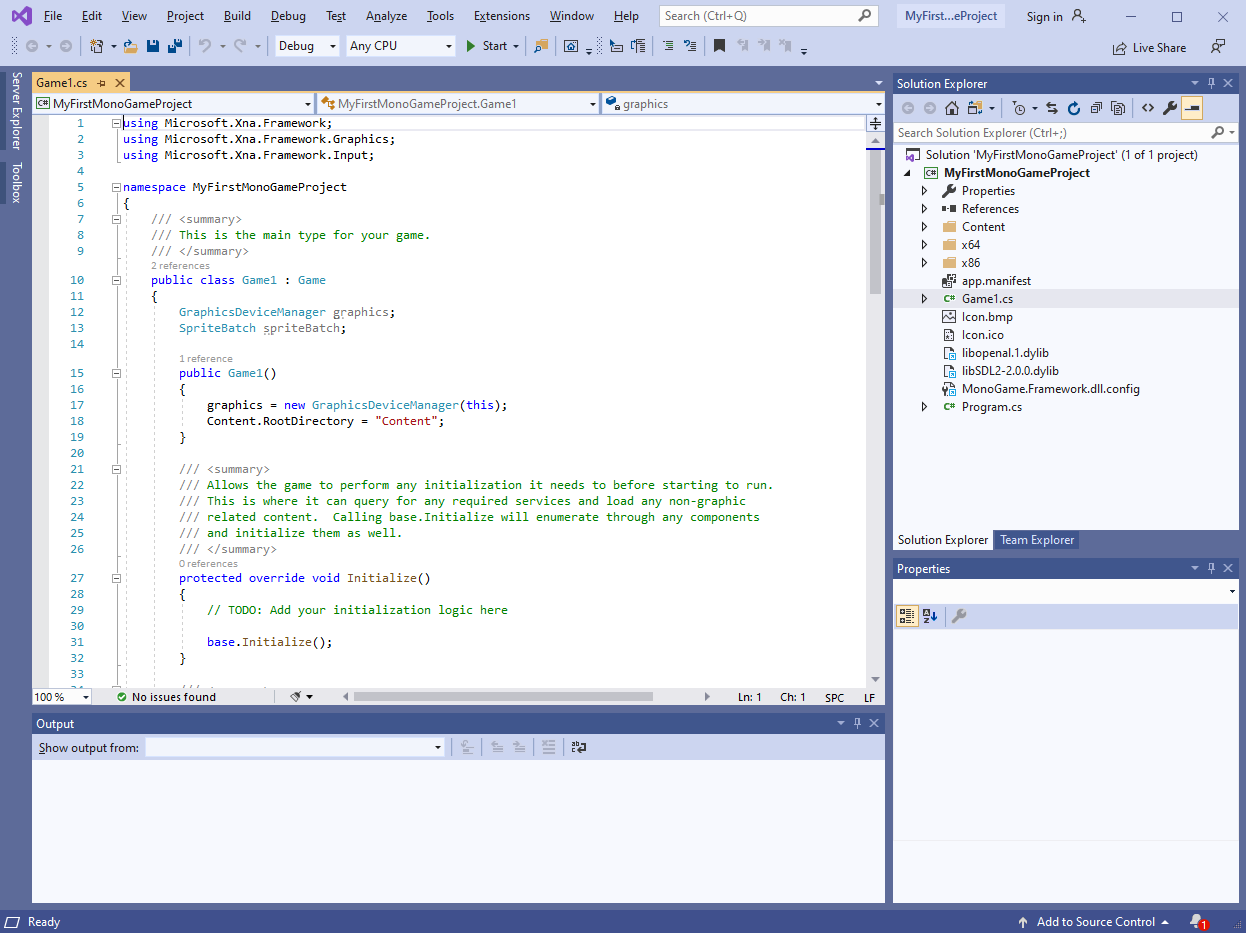
There are default Fields to manage your graphics device and for drawing sprites to the screen (GraphicsDeviceManager and SpriteBatch respectively).
There are default Methods for initializing your game, loading content, unloading content, updating your game, and drawing your game.
For now, click  (or click Debug > Start Debugging) and you will be greeted by MonoGame’s trademark cornflower blue window.
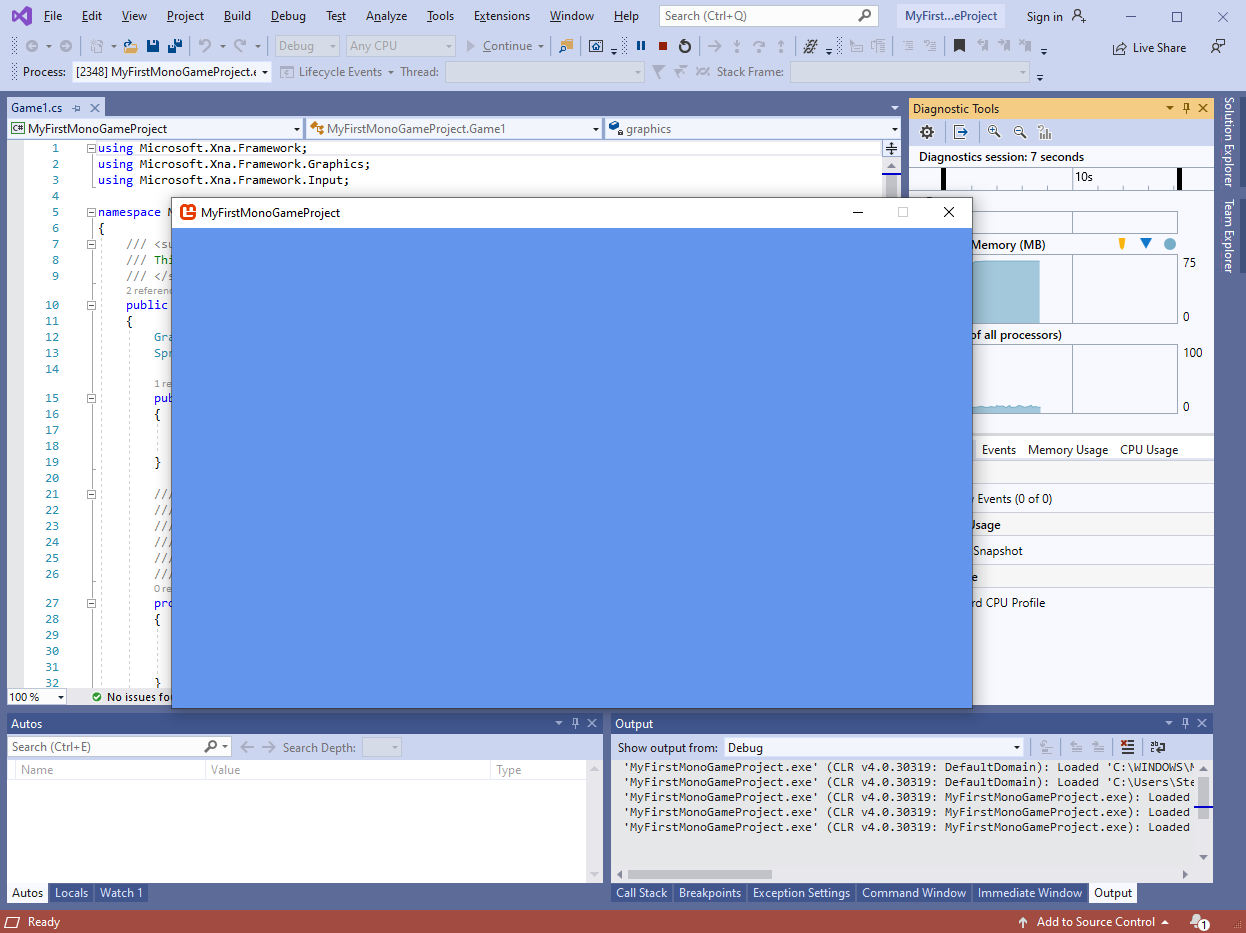
The foundation for your game has been laid. Now it’s time to add to it.
Further reading
The Update() cycle: https://www.industrian.net/tutorials/monogame-update/
The Draw() cycle: https://www.industrian.net/tutorials/monogame-draw/
Adding content to your game: https://www.industrian.net/tutorials/monogame-using-the-content-pipeline/